Technical Analysis
The allure of the financial markets often comes with a desire to predict their next move, to find an edge that translates into consistent profitability. For many traders, this quest leads to the realm of technical analysis, a discipline that focuses on deciphering market psychology and predicting future price trends by analyzing historical data. However, the path to mastering technical analysis is frequently cluttered with a bewildering array of indicators, many of which promise clarity but deliver confusion. The journey for reliable indicators can be one of disillusionment if not guided by credible information. This comprehensive guide aims to cut through that noise. It is meticulously crafted to demystify technical analysis and, more importantly, to spotlight the trading indicators that have demonstrated genuine utility and reliability, backed by evidence from academic studies, backtesting results, and the wisdom of seasoned trading experts. This article is designed not only to inform but also to empower traders with the knowledge to make more informed decisions, understand that reliability stems from correct application and context, and ultimately, to enhance their trading success in the dynamic markets of 2026 and beyond.
Decoding Market Moves: What is Technical Analysis and Why Should Traders Care?
Understanding the underlying forces of market behavior is crucial for any trader. Technical analysis offers a distinct lens through which to view and interpret these movements, focusing on the “how” and “when” of trading decisions rather than the “why” often addressed by fundamental analysis.

Beyond the Hype: A Clear Definition of Technical Analysis
Technical analysis is the study of historical price movements, trading volume, and other market statistics with the primary goal of forecasting future price trends. It operates on the premise that financial markets are not random but move in repeatable, quantifiable patterns that can be identified and exploited. Unlike fundamental analysis, which delves into a company’s financial health, management, and economic conditions to determine intrinsic value, technical analysis assumes that all such publicly available information is already reflected in an asset’s price. Therefore, technical analysts focus on the market’s own data, primarily price and volume, to gauge supply and demand dynamics and predict future price action.
This approach is frequently employed for short-term trading decisions, as it seeks to capture profits from price fluctuations that occur over shorter time horizons. The historical roots of modern technical analysis can be traced back to Charles Dow, the founder of the Wall Street Journal, whose Dow Theory laid much of the groundwork for the discipline as it is known today.
The Trader’s Edge: Key Goals of Using Technical Analysis
Traders turn to technical analysis for several key objectives, all aimed at improving decision-making and profitability:
- Identifying Trends and Momentum: A core goal is to discern the prevailing direction of the market, whether it’s an uptrend (prices generally rising), a downtrend (prices generally falling), or a sideways trend (prices consolidating within a range). Tools like moving averages are commonly used to smooth out price data and reveal the underlying trend. Understanding momentum, or the speed and strength of price changes, is also crucial.
- Pinpointing Support and Resistance: Technical analysis helps identify specific price levels where market dynamics are likely to shift. Support is a price level where buying interest is historically strong enough to overcome selling pressure, causing a downtrend to pause or reverse. Resistance is a price level where selling interest is historically strong enough to overcome buying pressure, causing an uptrend to pause or reverse. These levels often represent psychological barriers for market participants.
- Timing Entries and Exits: Perhaps the most practical application for many traders, technical analysis provides signals and patterns that suggest opportune moments to enter (buy) or exit (sell) a trade. The aim is to maximize profit potential and minimize risk by improving the timing of these actions.
- Risk Management: Technical analysis is intrinsically linked to risk management. Identified support and resistance levels, for example, can be used to set stop-loss orders, which are designed to limit potential losses if a trade moves unfavorably.
- Identifying Overbought/Oversold Levels: Certain technical indicators, known as oscillators, help traders identify conditions where an asset’s price may have moved too far, too fast, becoming “overbought” (and potentially due for a pullback) or “oversold” (and potentially due for a rebound). This provides insight into temporary extremes in investor psychology.
The Three Pillars: Core Principles/Assumptions That Drive Technical Analysis
The entire framework of technical analysis rests on three foundational assumptions. Grasping these principles is essential for understanding how and why technical indicators and chart patterns are interpreted.
- The Market Discounts Everything: This is a cornerstone belief in technical analysis. It posits that any factor that can influence an asset’s price, be it economic news, company earnings, political events, or broad market sentiment, is already reflected in its current market price. Therefore, a detailed analysis of the price action itself is considered sufficient, as it encapsulates all known information. This principle implies that technical analysis is inherently a study of market reaction to information, rather than the information itself. It focuses on how the collective of buyers and sellers interprets and acts upon news and data, with these actions being directly visible in price and volume changes. This focus on market reaction provides a powerful tool for gauging collective sentiment.
- Prices Move in Trends: Technical analysts operate under the assumption that price movements are not random but follow discernible trends. These trends can be upward (bullish), downward (bearish), or sideways (ranging or consolidation) and can persist for varying durations. A primary objective of technical analysis is to identify these trends early in their development to trade in alignment with them.
- History Tends to Repeat Itself: This principle is rooted in market psychology. It suggests that human behavior, driven by emotions like fear and greed, tends to be consistent over time. Consequently, chart patterns and price movements that have occurred in the past are likely to recur in the future as market participants react similarly to comparable stimuli. This link to behavioral finance suggests that the patterns identified are not merely arbitrary shapes but visual representations of collective human emotions. Understanding this allows traders to anticipate mass behavior by recognizing these recurring psychological responses to market events.
Table 1: At a Glance: Core Principles of Technical Analysis
| Principle | Brief Explanation | Implications for Traders |
| Market Discounts Everything | All known information (news, fundamentals, sentiment) is already reflected in the asset’s price. | Focus on price/volume analysis is sufficient; no need to analyze the news itself, but rather the market’s reaction to it. |
| Prices Move in Trends | Price movements are not random; they follow identifiable trends (uptrend, downtrend, sideways). | Identify trends early and trade in their direction to increase the probability of success. |
| History Tends to Repeat | Recurring chart patterns reflect consistent human psychological responses to similar market stimuli over time. | Past patterns can help forecast future price movements by anticipating recurring investor behavior. |
The Technical Analyst’s Arsenal: Understanding Indicator Categories
Technical indicators are the workhorses of the technical analyst. They are essentially mathematical calculations derived from an asset’s price, volume, or, in some cases, open interest data. Their primary purpose is to help forecast market direction, identify potential trading opportunities, and provide a more objective lens through which to analyze price action. Indicators can be broadly classified into several categories based on what they measure and how they function:
- Trend Indicators: These tools are designed to help traders assess the direction and strength of a market trend. They typically smooth out price data to provide a clearer view of the underlying momentum. Examples include Moving Averages and the Ichimoku Cloud. Trend indicators are generally considered lagging indicators because they confirm trends that are already underway.
- Momentum Indicators: Momentum indicators measure the speed and change of price movements. They are often used to identify overbought or oversold conditions, signaling that a price move may be losing steam and could be due for a reversal or consolidation. Common examples include the Relative Strength Index (RSI), Stochastic Oscillator, and Moving Average Convergence Divergence (MACD). Momentum indicators are often leading indicators, attempting to predict future price movements.
- Volume Indicators: These indicators focus on the amount of trading activity (volume) accompanying price movements. Volume is seen as a measure of conviction behind a price trend; a strong trend is typically supported by increasing volume. On-Balance Volume (OBV) is a well-known volume indicator.
- Volatility Indicators: Volatility indicators measure the rate and magnitude of price fluctuations. High volatility indicates significant price swings, while low volatility suggests a quieter market. Understanding volatility can help traders adjust their strategies and risk management. Bollinger Bands and Average True Range (ATR) are common volatility indicators.
A crucial distinction when working with indicators is whether they are leading or lagging. Leading indicators aim to predict future price movements and often provide signals before a new trend or reversal begins. While this offers the advantage of early entry, they are also prone to generating more false signals, especially in non-trending markets. Momentum oscillators like RSI and Stochastics are typically leading. Lagging indicators, on the other hand, follow price action and confirm trends or reversals that are already in progress. This means signals may come later, potentially resulting in missed early opportunities, but they tend to be more reliable. Moving averages are classic lagging indicators. Understanding this distinction is vital because traders often misuse indicators by expecting predictive signals from lagging tools or by being whipsawed by the premature signals of leading ones in the wrong market context. The general guidance is to lean on lagging indicators during clearly trending markets and to consider leading indicators more in sideways or ranging markets.

The A-List: Deep Dive into the Most Reliable Technical Indicators
While countless technical indicators exist, not all are created equal in terms of their utility and reliability. This section delves into some of the most widely respected and practically applied indicators. It’s crucial to understand that an indicator’s “reliability” isn’t an absolute measure; it’s highly dependent on the market context, the asset being traded, the parameters chosen, and, most importantly, how the trader interprets and combines its signals with other analytical tools and sound risk management. The quest for a single, infallible indicator is futile. Instead, the focus should be on understanding the strengths and weaknesses of proven tools and applying them intelligently.
Table 2: Top Technical Indicators: Overview & Reliability Snapshot
| Indicator Name | Type | Primary Use | Key Calculation Element(s) | Brief Reliability Insight |
| Moving Averages (SMA, EMA) | Trend | Trend identification, dynamic support/resistance, crossover signals | Average price over a set period (SMA); weighted for recency (EMA) | Effectiveness varies with length and market type; optimal parameters can outperform buy-and-hold. Can whipsaw in ranges. |
| Relative Strength Index (RSI) | Momentum | Overbought/ oversold conditions, divergence, momentum confirmation | Compares average gains to average losses | High win rate in some backtests. Standard 30/70 levels may lose efficacy; altered thresholds can be profitable. |
| MACD | Trend & Momentum | Trend direction, momentum strength, crossover signals, divergence | Difference between two EMAs (MACD line), EMA of MACD (signal line) | Profitable in some markets. Prone to false signals in ranging markets. |
| Bollinger Bands | Volatility | Ratios from the Fibonacci sequence applied to price swings | SMA with standard deviation bands | High win rates in some backtests. Squeeze breakouts can be powerful but need confirmation. |
| On-Balance Volume (OBV) | Volume | Volume flow, trend confirmation, divergence | Cumulative volume based on price closes | Backtests show the potential to outperform buy-and-hold with specific strategies (trend confirmation, divergence). Leading nature can give false signals. |
| Fibonacci Retracement | Support/ Resistance | Potential reversal levels during pullbacks, profit targets (with extensions) | Ratios from the Fibonacci sequence applied to price swings | Widely watched (self-fulfilling prophecy). Effectiveness depends on swing point selection; best with confirmation. |
| Ichimoku Cloud | Trend & Support/ Resistance | All-in-one trend, momentum, support/ resistance identification | Multiple moving averages forming a “cloud” | Can underperform buy-and-hold with raw signals. Combining with ML or other filters may improve performance. Less effective in ranges. |
| Stochastic Oscillator | Momentum | Overbought/ oversold conditions, divergence, crossovers | Compares closing price to its price range over a period | Good for range-bound markets and divergences. Prone to false signals in strong trends. |
Moving Averages (SMA & EMA): The Unshakeable Foundation of Trend Analysis
Moving Averages (MAs) are fundamental tools in technical analysis, designed to smooth out price data to identify the underlying trend direction and potential support or resistance levels.
- Simplified Calculation:
- Simple Moving Average (SMA): Calculated by taking the arithmetic mean of an asset’s closing prices over a specific number of periods. For instance, a 10-day SMA is the sum of the closing prices for the last 10 days, divided by 10. As new data comes in, the oldest data point is dropped, causing the average to “move.”
- Exponential Moving Average (EMA): This type of MA gives greater weight to more recent prices, making it more responsive to new information and recent price changes compared to an SMA.
- Interpreting Signals:
- Trend Direction: When the price is consistently trading above a moving average, it generally indicates an uptrend. Conversely, if the price is below the moving average, it suggests a downtrend. A flat or sideways MA often signals a ranging or consolidating market.
- Dynamic Support and Resistance: In an uptrend, longer-term MAs (like the 50-day or 200-day) often act as dynamic support levels, where prices may find buying interest on pullbacks. In a downtrend, they can act as dynamic resistance levels.
- Crossover Signals – Spotting Major Shifts: The Golden Cross & Death Cross Explained:
- Golden Cross: A potentially bullish signal that occurs when a shorter-term MA (e.g., 50-day SMA) crosses above a longer-term MA (e.g., 200-day SMA). This is often interpreted as the beginning of a potential long-term uptrend.
- Death Cross: A potentially bearish signal that occurs when a shorter-term MA crosses below a longer-term MA. This is often seen as indicating the potential start of a long-term downtrend.
- Real-World Examples & Case Studies (Successes/Failures):
MA crossover strategies, like the Golden Cross and Death Cross, can effectively signal long-term trend changes. For example, a Golden Cross on a major stock index might precede a multi-month rally. However, in choppy or sideways markets, these same crossover signals can lead to “whipsaws”, multiple false signals resulting in losing trades as the MAs cross back and forth without a sustained trend emerging. An empirical study by Kantaria & Tanna on selected Indian stocks found that various EMA crossover strategies outperformed a simple buy-and-hold strategy in 61% of the cases analyzed. Research by Avramov, Kaplanski, and Subra introduced the concept of Moving Average Distance (MAD), the difference between short-run and long-run MAs, and found it to be a predictor of cross-sectional stock returns, even outperforming standard momentum strategies. Conversely, a trader relying solely on a 9-EMA crossing a 21-EMA for intraday trades might experience numerous failed signals during a day with no clear directional bias. - Reliability Insights (Studies/Backtests):
The effectiveness of MA strategies is highly dependent on the chosen length parameters. Academic research indicates that MACS using optimal length parameters can often outperform both standard parameters and buy-and-hold strategies, especially in volatile markets. However, other studies present mixed results, with some showing MA strategies underperforming buy-and-hold, particularly when common, non-optimized parameters are used. For instance, one backtest on the Dow Jones Industrial Average (DJIA) over nearly 100 years showed a 50-period SMA having a relatively low win rate of 28.6%, while a 50-period EMA had a 30.7% win rate. This underscores that “reliability” is not absolute and depends heavily on the specific MA type, length, asset, and market conditions. - Pros: MAs are simple to understand and visually effective for identifying the general trend and potential support/resistance areas. Crossover signals are clear and unambiguous.
- Cons: MAs are lagging indicators, meaning they confirm trends already in progress, which can lead to late entries or exits. They are notoriously unreliable in ranging or choppy markets, frequently generating false signals (whipsaws).

Relative Strength Index (RSI): Your Gauge for Market Momentum & Extremes
The Relative Strength Index (RSI) is a popular momentum oscillator developed by J. Welles Wilder. It measures the speed and change of price movements to evaluate overbought or oversold conditions in the price of an asset and to identify potential trend reversals.
- Simplified Calculation: The RSI compares the magnitude of recent gains to recent losses over a specified time period (typically 14 periods) and converts this information into a number ranging from 0 to 100. The formula is RSI=100−(100/(1+RS)), where RS (Relative Strength) is the average of x days’ up closes divided by the average of x days’ down closes.
- Interpreting Signals:
- Overbought/Oversold Levels:
- An RSI reading above 70 is traditionally considered overbought, suggesting the asset may be overvalued and due for a price correction or pullback. Some traders use a more extreme level of 80.
- An RSI reading below 30 is traditionally considered oversold, suggesting the asset may be undervalued and poised for a rebound. Some traders use a more extreme level of 20.
- Midpoint (50 Level): A move above 50 is often seen as indicative of bullish momentum, while a move below 50 suggests bearish momentum.
- Behavior in Trending Markets: It’s crucial to note that in strong trends, the RSI can remain in overbought or oversold territory for extended periods. For instance, during a robust uptrend, the RSI may oscillate primarily between 40 and 70 (or even higher), with dips toward 40 or 50 acting as buying opportunities rather than true oversold signals.
- Beyond Overbought/Oversold: Unlocking the Power of RSI Divergence: Divergence occurs when the price and the RSI move in opposite directions, often signaling a potential trend reversal.
- Bullish Divergence: The price makes new lower lows, but the RSI forms higher lows. This indicates that selling momentum is weakening, and an upward reversal may be imminent.
- Bearish Divergence: The price makes new higher highs, but the RSI forms lower highs. This suggests that buying momentum is fading, and a downward reversal could occur.
- Failure Swings: These are considered strong confirmation of trend reversals. A bullish failure swing occurs when, after dipping into oversold territory, the RSI fails to make a new low on a subsequent price dip and then breaks above its previous reaction high. A bearish failure swing is the opposite in overbought territory.
- Overbought/Oversold Levels:
- Real-World Examples & Case Studies (Successes/Failures):
A common successful scenario involves a stock price reaching an RSI reading below 30, forming a bullish divergence with a subsequent price low, and then rallying significantly. For example, a stock might fall to a new low, but the RSI prints a higher low; if this occurs near a known support level, traders might look for a buy signal. Conversely, a stock making a new high with the RSI showing a lower high (bearish divergence) could precede a sharp price decline, especially if confirmed by other bearish signals. However, a frequent failure occurs during very strong, sustained uptrends where the RSI may stay above 70 for weeks or months, giving premature sell signals to traders expecting a correction. - Reliability Insights (Studies/Backtests):
The reliability of RSI can be nuanced. A study by Anderson & Li (2015) on the CHF/USD currency pair found that the standard RSI configuration (14-period, 30/70 thresholds) yielded a small loss. However, when the buy/sell thresholds were altered (e.g., to 20/80 or 10/90, or even less extreme like 35/65), the RSI strategy could generate profits. This suggests that as standard parameters become widely known, their effectiveness might diminish, necessitating adaptation. Another study focusing on the cryptocurrency market indicated that while standard RSI applications carry high risk, alternative uses like divergence analysis or trend determination could offer an advantage. Research by Chong & Ng (2008), revisited in a later paper, found that an RSI(14,30/70) rule was profitable in the Dow Jones Industrials Index, and an RSI(21,50) rule generated significant abnormal returns in the Milan and Toronto stock markets. In a comprehensive backtest on the DJIA, RSI(14) exhibited a high win rate of 79.4%. These varied findings highlight that RSI’s reliability is not universal but depends on parameters, market, and application. - Pros: The RSI is relatively simple to understand and provides clear visual signals for overbought and oversold conditions. Its divergence signals are considered powerful for anticipating potential reversals. It can be particularly effective in range-bound markets where prices oscillate.
- Cons: In strongly trending markets, the RSI can remain in overbought or oversold territory for extended periods, generating false or premature reversal signals. As a leading indicator, its signals can sometimes appear too early. The effectiveness of standard parameters can erode over time as they become widely adopted.
MACD (Moving Average Convergence Divergence): The Two-in-One Trend & Momentum Powerhouse
The Moving Average Convergence Divergence (MACD) indicator, developed by Gerald Appel, is a versatile tool that functions as both a trend-following and momentum indicator. It shows the relationship between two exponential moving averages (EMAs) of an asset’s price.
- Simplified Calculation:
- MACD Line: Calculated by subtracting the 26-period EMA from the 12-period EMA.
- Signal Line: A 9-period EMA of the MACD Line. This line is plotted on top of the MACD line and acts as a trigger for buy and sell signals.
- Histogram: Represents the difference between the MACD Line and the Signal Line. The histogram bars are positive when the MACD line is above the Signal line and negative when it’s below. The height of the bars visually indicates the degree of convergence or divergence.
- Interpreting Signals, Reading the Signals: MACD Line Crossovers & Histogram Insights:
- Signal Line Crossovers:
- Bullish Crossover: When the MACD Line crosses above the Signal Line, it’s generally considered a buy signal, suggesting increasing upward momentum.
- Bearish Crossover: When the MACD Line crosses below the Signal Line, it’s typically interpreted as a sell signal, indicating increasing downward momentum.
- Zero Line Crossovers:
- When the MACD Line crosses above the zero line, it suggests that the 12-period EMA has crossed above the 26-period EMA, indicating bullish momentum or the start of an uptrend.
- When the MACD Line crosses below the zero line, it indicates bearish momentum or the start of a downtrend. The farther the MACD moves from zero, the stronger the momentum.
- Histogram: The histogram visually represents the convergence and divergence of the MACD and Signal lines. When the histogram bars are widening (moving further from zero), it indicates that momentum is increasing. When the bars are shrinking (moving closer to zero), momentum is decreasing. A crossover of the histogram above or below the zero line confirms a MACD/Signal line crossover.
- Divergence: Similar to the RSI, divergence between the MACD and price can signal potential trend reversals.
- Bullish Divergence: Price makes lower lows, but the MACD makes higher lows, suggesting weakening selling pressure.
- Bearish Divergence: Price makes higher highs, but the MACD makes lower highs, indicating weakening buying pressure.
- Signal Line Crossovers:
- Real-World Examples & Case Studies (Successes/Failures):
A successful trade might involve identifying a bullish MACD crossover (MACD line above the signal line) while the MACD is above the zero line, confirmed by an expanding histogram, leading to a profitable long position as the price rallies. Another example is a bearish divergence where the price makes a new high, but the MACD forms a lower high, followed by a bearish MACD crossover, signaling a market top before a significant price decline. Conversely, in a sideways or choppy market, the MACD can generate multiple false crossovers, leading to small losses as the lines whipsaw back and forth without a clear trend developing. - Reliability Insights (Studies/Backtests):
Academic research has shown mixed results for MACD profitability. A study by Chong and Ng (2008) and a subsequent paper found that the MACD(12,26,0) rule consistently generated significant abnormal returns in the Milan Comit General and S&P/TSX Composite stock indices, even after accounting for 1% transaction costs. However, a study on 20 stocks in the Indonesian capital market over a six-year period indicated that while a Buy & Hold strategy generally produced higher returns, the MACD strategy offered more stable returns and lower losses in certain instances. Statistically, there was no significant difference found between the two strategies in that particular study, though Buy & Hold had a higher average return. In a long-term backtest on the DJIA, the MACD showed a win rate of 40.1%. These findings suggest that MACD’s effectiveness can vary by market and potentially by the specific parameters and rules applied. - Pros: The MACD is a versatile indicator that combines trend-following and momentum aspects. Its signals are relatively easy to interpret, and it’s widely available on charting platforms. It is considered effective in trending markets.
- Cons: As a lagging indicator (since it’s based on moving averages), its signals can sometimes be late, especially during fast-moving markets. It is prone to generating false signals in sideways or choppy market conditions.
Bollinger Bands: Riding Volatility Waves & Nailing Breakouts
Bollinger Bands, developed by John Bollinger, are a volatility indicator consisting of three lines: a middle band (typically a 20-period Simple Moving Average) and two outer bands plotted at a standard deviation (typically two standard deviations) above and below the middle band. The bands automatically widen when volatility increases and narrow when volatility decreases.
- Simplified Calculation:
- Middle Band: N-period Simple Moving Average (SMA), commonly 20 periods.
- Upper Band: Middle Band + (K × N-period standard deviation of price), where K is typically 2.
- Lower Band: Middle Band – (K × N-period standard deviation of price), where K is typically 2.
- Interpreting Signals:
- Volatility Assessment: The width of the bands is a direct measure of market volatility. Wide bands indicate high volatility, while narrow bands signify low volatility.
- Overbought/Oversold Conditions: Prices trading near the upper band may be considered relatively high or potentially overbought, while prices near the lower band may be considered relatively low or potentially oversold. However, it’s crucial to note that in strong trends, prices can “walk the band” (i.e., repeatedly touch or move along an outer band) for extended periods without reversing.
- The Squeeze & The Bounce: Profitable Bollinger Band Strategies:
- Bollinger Bounce: This strategy relies on the tendency of prices to revert to the middle band. In a ranging market (when bands are relatively stable or contracting), traders might look to buy when the price touches the lower band and sell when it touches the upper band, targeting the middle band for profit. This strategy should generally be avoided when the bands are expanding, as this often indicates a trending market where mean reversion is less likely.
- Bollinger Squeeze (Breakout Strategy): This occurs when the bands narrow significantly, indicating a period of low volatility and consolidation. Such squeezes often precede a period of high volatility and a significant price breakout. Traders wait for the price to break decisively above the upper band (for a buy signal) or below the lower band (for a sell signal), often confirming the breakout with increased volume or other indicators.
- Real-World Examples & Case Studies (Successes/Failures):
The Starbucks (SBUX) chart provided an example of both a successful upside breakout following a Bollinger Band Squeeze and a subsequent failed upside breakout that led to a downside move, highlighting the need for directional confirmation. In the Intuit (INTU) example, a rising On-Balance Volume (OBV) during a squeeze signaled accumulation and correctly foreshadowed an upside breakout. Conversely, for Lowe’s (LOW), a negative Chaikin Money Flow during a squeeze indicated distribution, preceding a downside break. A “head fake” is a common failure, where prices break one band, luring traders in, only to quickly reverse and break the opposite band. - Reliability Insights (Studies/Backtests):
Backtesting studies have shown varying results. Research by Optionsamurai on ETFs, stocks, and commodities indicated mean-reversion tendencies when prices spent 2-3 consecutive days outside the Bollinger Bands, with outcomes differing between bull and bear market conditions. For example, stocks trading 2 days below the lower band tended to show a positive return 6 days later. Another source mentioned a backtest where Bollinger Bands (using a 50-day MA and 3 standard deviations) outperformed a buy-and-hold strategy over a 5-day holding period. In extensive DJIA backtests, Bollinger Bands demonstrated high win rates, with figures like 77.8% (in-sample) and 81.25% (out-of-sample) being reported. - Pros: Bollinger Bands dynamically adapt to market volatility, providing a relative definition of high and low. They offer clear visual signals for potential overbought/oversold levels and are particularly useful for identifying breakout opportunities after a squeeze.
- Cons: Bollinger Bands are not a standalone trading system; their signals often require confirmation from other indicators or price action analysis. In strong trends, prices can “walk the band” for extended periods, leading to false reversal signals if interpreted purely as overbought or oversold. The Bollinger Squeeze itself does not predict the direction of the ensuing breakout.

On-Balance Volume (OBV): Tracking Smart Money with Volume Flow
On-Balance Volume (OBV), developed by Joseph Granville, is a momentum indicator that uses volume flow to predict changes in stock prices. It operates on the principle that volume precedes price, meaning changes in OBV can often signal future price movements. OBV is a running cumulative total of volume, where volume is added on days the price closes up and subtracted on days the price closes down.
- Simplified Calculation:
- If today’s closing price is higher than yesterday’s closing price: Current OBV = Previous OBV + Today’s Volume.
- If today’s closing price is lower than yesterday’s closing price: Current OBV = Previous OBV – Today’s Volume.
- If today’s closing price is equal to yesterday’s closing price: Current OBV = Previous OBV.
The actual numerical value of OBV is not important; rather, its direction and slope carry the analytical weight.
- Interpreting Signals, Confirming Trends & Spotting Reversals with OBV:
- Trend Confirmation: When the OBV line moves in the same direction as the price trend, it confirms the trend’s strength. A rising price accompanied by a rising OBV suggests strong buying pressure supporting the uptrend. Conversely, a falling price with a falling OBV indicates strong selling pressure, confirming the downtrend.
- Divergence: Divergence between price and OBV can be a powerful signal of a potential trend reversal.
- Bullish Divergence: Occurs when the price makes new lower lows, but the OBV line makes higher lows. This suggests that despite falling prices, volume is starting to flow in, indicating that selling pressure may be diminishing and an upward reversal could be imminent.
- Bearish Divergence: Occurs when the price makes new higher highs, but the OBV line makes lower highs (or fails to make new highs). This implies that buying pressure is weakening despite rising prices, potentially signaling an upcoming downward reversal.
- Breakouts: A breakout in the OBV line (e.g., OBV breaking above its own trendline or resistance level) can often precede a similar breakout in price. This is particularly significant if OBV breaks out from a consolidation pattern while the price is still ranging, suggesting accumulation or distribution is taking place.
- Real-World Examples & Case Studies (Successes/Failures):
A common successful application is observing a stock in an uptrend where both price and OBV are making higher highs and higher lows, confirming the trend’s health. An example of bearish divergence could be a stock reaching a new price high, but its OBV failing to surpass its previous high, followed by a price decline. A case of failure might involve a strong bullish OBV divergence that doesn’t lead to a price reversal, perhaps due to overwhelming negative news that overrides the volume signal. - Reliability Insights (Studies/Backtests):
Backtesting results for OBV strategies have shown promise. One study indicated that an OBV trend confirmation strategy yielded an average annual return of 9% compared to a 6% return for a buy-and-hold approach over a 5-year period on a major stock index, with a lower maximum drawdown. An OBV divergence trading strategy reportedly had a win rate of 68% and an average annual return of 12% on a popular tech stock over 3 years. An OBV breakout strategy on an energy stock over 4 years yielded an 11% average annual return. These results suggest that OBV, when applied systematically, can offer an edge. - Pros: OBV is relatively simple to calculate and interpret. It’s effective for confirming trend strength and identifying potential reversals through divergences. It is often considered a leading indicator because changes in volume flow can precede price changes.
- Cons: Because it is a leading indicator, OBV can sometimes produce false signals. The absolute value of OBV is irrelevant; only its direction and changes in direction matter. Large, single-day volume spikes (e.g., due to news or an institutional block trade) can disproportionately affect the OBV line, potentially distorting its signals if not considered in context.
Fibonacci Retracement & Extensions: Trading with Nature’s Secret Code
Fibonacci retracement and extension levels are technical analysis tools based on the Fibonacci sequence, a series of numbers where each number is the sum of the two preceding ones (0, 1, 1, 2, 3, 5, 8, 13, etc.). Key ratios derived from this sequence (23.6%, 38.2%, 50%, 61.8%, and 78.6%) are used to identify potential support and resistance levels where price might reverse or stall during a pullback in a trend. Fibonacci extensions project potential price targets beyond the initial price swing.
- Simplified Calculation: Traders identify a significant price swing by selecting two extreme points on a chart: a Swing High and a Swing Low. The vertical distance between these two points is then divided by the key Fibonacci ratios to plot horizontal lines at these percentage levels. For example, a 38.2% retracement level would be 38.2% of the total price swing measured from the starting point of the retracement. The 50% level, though not a true Fibonacci ratio, is also widely used.
- Interpreting Signals:
- Retracement Levels as Support/Resistance: In an uptrend, after a price advance, if the price pulls back, the Fibonacci retracement levels (e.g., 38.2%, 50%, 61.8%) are watched as potential support zones where the price might stop falling and resume the uptrend. In a downtrend, during a corrective rally, these levels act as potential resistance zones.
- Key Retracement Levels: The 38.2%, 50%, and particularly the 61.8% (often called the “Golden Ratio”) levels are considered significant areas where reversals are more likely to occur. The “Golden Zone” between 50% and 61.8% is often highlighted as a high-probability reversal area.
- Extension Levels as Profit Targets: Fibonacci extension levels (e.g., 127.2%, 161.8%, 261.8%) are projected from a completed retracement to estimate potential price targets for the next leg of the trend.
- Real-World Examples & Case Studies (Successes/Failures):
A classic example involves a stock in a strong uptrend making a significant move from $50 to $60. It then retraces to the $53.82 level (a 61.8% retracement of the $10 move). If this level coincides with a previous support area or a rising trendline, and a bullish candlestick pattern forms, a trader might enter a long position, placing a stop-loss below the 61.8% level or the swing low. The profit target could then be set at the 161.8% extension of the initial $10 move, projected from the retracement low. The NVIDIA (NVDA) example detailed a stock retracing to the 78.6% level after an 86% move, finding support, and then rallying to the 127.2% extension target, with confirmation from an MA crossover and volume. Failures can occur when price slices through multiple Fibonacci levels without pausing, especially if the initial trend was weak or if major news disrupts the pattern. The subjective selection of Swing High and Swing Low points can also lead to different traders identifying different levels, impacting consistency. - Reliability Insights (Studies/Backtests):
The effectiveness of Fibonacci levels is often attributed to their widespread use, creating a self-fulfilling prophecy: because so many traders are watching these levels and placing orders around them, they tend to act as support or resistance. Specific statistical studies on the standalone reliability of Fibonacci levels are not prominently featured in the provided materials, but their combination with other indicators (like trendlines, moving averages, RSI, and candlestick patterns) is consistently emphasized to improve accuracy and confirm signals. - Pros: Fibonacci tools provide clear, objective price levels for potential support, resistance, and profit targets. They are widely available on charting platforms and applicable across all markets and timeframes.
- Cons: The selection of Swing High and Swing Low points can be subjective, leading to inconsistency in how levels are drawn and interpreted. Fibonacci levels are not foolproof; prices can and do break through them. They tend to work best in clearly trending markets and are less reliable in choppy or sideways conditions. They have low predictive power when used in isolation and require confirmation.

Ichimoku Cloud (Kinko Hyo): The All-In-One Market Snapshot
The Ichimoku Cloud, or Ichimoku Kinko Hyo (“one glance equilibrium chart”), is a comprehensive technical indicator developed by Goichi Hosoda. It aims to provide a quick, visual snapshot of trend direction, momentum, and potential support and resistance zones using five distinct lines and a shaded area known as the “Cloud” or “Kumo”.
- Simplified Calculation (Components):
- Tenkan-sen (Conversion Line): (Highest High + Lowest Low) / 2, over the past 9 periods. Represents short-term momentum.
- Kijun-sen (Base Line): (Highest High + Lowest Low) / 2, over the past 26 periods. Represents medium-term momentum and equilibrium.
- Senkou Span A (Leading Span A): (Tenkan-sen + Kijun-sen) / 2, plotted 26 periods into the future. Forms one edge of the Kumo.
- Senkou Span B (Leading Span B): (Highest High + Lowest Low) / 2, over the past 52 periods, plotted 26 periods into the future. Forms the other edge of the Kumo.
- Chikou Span (Lagging Span): The current closing price plotted 26 periods in the past. Used for trend confirmation.
- Kumo (Cloud): The area between Senkou Span A and Senkou Span B.
- Interpreting Signals:
- Trend Direction:
- Price trading above the Kumo: Bullish trend.
- Price trading below the Kumo: Bearish trend.
- Price trading inside the Kumo: Neutral, consolidating, or unclear trend.
- Support and Resistance: The Kumo itself acts as a dynamic zone of support (when price is above) or resistance (when price is below). The thicker the Kumo, the stronger the support/resistance is considered to be.
- Tenkan-sen / Kijun-sen Cross:
- Bullish Cross: Tenkan-sen crosses above Kijun-sen (buy signal). Stronger if it occurs above the Kumo.
- Bearish Cross: Tenkan-sen crosses below Kijun-sen (sell signal). Stronger if it occurs below the Kumo.
- Chikou Span (Lagging Span) Confirmation:
- Bullish: Chikou Span is above the price action from 26 periods ago (confirms uptrend).
- Bearish: Chikou Span is below the price action from 26 periods ago (confirms downtrend).
- Kumo Breakout: Price breaking out of the Kumo (above for bullish, below for bearish) is a significant signal, especially if the Kumo is thick.
- Kumo Twist: When Senkou Span A and Senkou Span B cross, changing the “color” of the future Kumo. This can signal a potential future trend change.
- Trend Direction:
- Real-World Examples & Case Studies (Successes/Failures):
A crypto trading example for Bitcoin (BTC) described a scenario where the price breaking above the Kumo, confirmed by increasing trading volume and an RSI not in overbought territory, signaled a potential shift from a bearish to a bullish trend. Failures often occur in choppy, sideways markets where the Ichimoku Cloud can produce frequent and unclear signals, leading to whipsaws. For instance, if the price is oscillating within a flat Kumo, Tenkan/Kijun crosses might be unreliable. - Reliability Insights (Studies/Backtests):
Backtesting results for the Ichimoku Cloud are mixed. Some studies, like one by Quantified Strategies, suggest that while Ichimoku can reduce drawdowns, it often fails to outperform a simple buy-and-hold strategy across various assets like the S&P 500 (Ichimoku CAGR 5.2% vs. Buy-and-Hold 6.9%). However, for Bitcoin, the same study showed Ichimoku outperforming (78.05% vs. 59.8%). Another study by Tejwin, which combined Ichimoku with an XGBoost machine learning algorithm, found that this hybrid strategy significantly outperformed both the raw Ichimoku strategy (which itself underperformed buy-and-hold with a 15.44% cumulative return vs. 61.24% for buy-and-hold). In a DJIA backtest, Ichimoku showed a win rate of 42.3% (46% in-sample, 38.68% out-of-sample). These studies indicate that the “raw” Ichimoku with standard parameters might not always be superior, and its effectiveness can be market-dependent or enhanced by combination with other tools or methodologies. - Pros: The Ichimoku Cloud is a comprehensive, all-in-one indicator providing multiple layers of information (trend, momentum, support/resistance) in a single visual display. Its forward-looking Kumo projection is a unique feature.
- Cons: It can appear complex and overwhelming for beginners. It is generally less effective in non-trending, sideways markets where it can generate confusing or false signals. Its components are lagging, and the fixed default parameters (9, 26, 52) may not be optimal for all markets or timeframes.
Stochastic Oscillator: Pinpointing Turning Points in Overbought/Oversold Markets
The Stochastic Oscillator, developed by George Lane, is a momentum indicator that compares a security’s closing price to its price range over a specific period (typically 14 periods). It operates on the premise that in an uptrend, prices tend to close near their highs, and in a downtrend, they tend to close near their lows. The indicator is scaled from 0 to 100 and is primarily used to identify overbought and oversold conditions and potential turning points.
- Simplified Calculation:
- %K Line (Fast Stochastic): $ %K = [(Current Close – Lowest Low_n) / (Highest High_n – Lowest Low_n)] \times 100 $, where ‘n’ is the look-back period (e.g., 14 days).
- %D Line (Slow Stochastic / Signal Line): Typically a 3-period Simple Moving Average (SMA) of the %K line. (Note: The “Slow Stochastic” often involves an initial smoothing of the %K line before the %D calculation, making both lines smoother than the “Fast Stochastic”).
- Interpreting Signals:
- Overbought/Oversold Levels:
- Overbought: Readings above 80 are generally considered overbought, suggesting the price may be due for a pullback or reversal downwards.
- Oversold: Readings below 20 are generally considered oversold, indicating the price may be due for a rally or reversal upwards.
- Caution in Strong Trends: In strongly trending markets, the Stochastic Oscillator can remain in overbought or oversold territory for extended periods, giving premature or false reversal signals.
- %K and %D Crossovers:
- Buy Signal: When the %K line crosses above the %D line, especially when both lines are in the oversold region (below 20), it can be interpreted as a buy signal.
- Sell Signal: When the %K line crosses below the %D line, particularly when both lines are in the overbought region (above 80), it can be seen as a sell signal.
- Divergence:
- Bullish Divergence: Occurs when the price makes a new lower low, but the Stochastic Oscillator forms a higher low. This signals a weakening downward momentum and a potential bullish reversal.
- Bearish Divergence: Occurs when the price makes a new higher high, but the Stochastic Oscillator forms a lower high. This indicates a weakening upward momentum and a potential bearish reversal.
- Overbought/Oversold Levels:
- Real-World Examples & Case Studies (Successes/Failures):
A successful trade might involve spotting a bullish divergence on a stock chart: the price hits a new low, but the Stochastic Oscillator makes a higher low. If this is followed by a %K/%D crossover above 20 and a break of short-term price resistance, it could lead to a profitable long entry. For instance, Chart 6 in one source showed a bullish divergence on International Gaming Tech (IGT) confirmed by a signal line cross, a move above 50 on the oscillator, and a price resistance break. Conversely, a common failure is when a trader repeatedly sells short every time the Stochastic hits >80 in a powerful, sustained uptrend, only to see the price continue to climb. - Reliability Insights (Studies/Backtests):
The Stochastic Oscillator is often cited for its effectiveness in range-bound markets, where it can help identify turning points near support and resistance levels. In a DJIA backtest, Stochastics demonstrated a win rate of 44.9%. Its reliability decreases in strongly trending markets, where it tends to give frequent false overbought/oversold signals. - Pros: The Stochastic Oscillator is relatively easy to interpret for overbought and oversold conditions. It is effective at identifying potential divergences, which can be strong reversal signals, particularly in ranging markets.
- Cons: It is prone to generating false signals in strongly trending markets, as it can remain in extreme zones for long durations. The indicator can be “noisy” and produce frequent whipsaws (false buy/sell signals) in volatile market conditions.
The exploration of these indicators reveals a critical theme: indicator “reliability” is highly contextual and parameter-dependent. No indicator is inherently flawless; its effectiveness varies significantly based on market conditions (trending versus ranging markets, as noted for MAs, MACD, and Stochastics), the specific asset class being traded (stocks, forex, cryptocurrencies), the parameters chosen by the trader (such as RSI thresholds or moving average lengths), and whether the indicator is used in isolation or as part of a broader analytical framework. For example, research shows that standard RSI 30/70 levels might lose their edge over time, while moving averages with optimized length parameters can outperform those with standard settings. This implies a dynamic approach from the trader, involving active testing and adaptation rather than passive adoption of default settings.
Furthermore, the popularity of an indicator or its standard settings can potentially erode its efficacy over time. The study on RSI in the CHF/USD market suggested that widely known configurations might become less profitable as they are adopted by more traders, potentially leading to the arbitrage of their predictive power. This necessitates a continuous search for unique applications, refined parameters, or combinations to maintain an edge.
Across discussions of various indicators like Bollinger Band Squeezes, Fibonacci retracements, and Ichimoku Cloud breakouts, volume confirmation emerges as a crucial meta-strategy. The recurring emphasis on checking for increased volume during breakouts or significant price moves suggests that volume analysis acts as an essential validation layer for signals generated by other types of indicators, confirming market participation and conviction behind a move.
Finally, the concept of divergence stands out as a powerful analytical tool applicable across multiple momentum oscillators. Bullish and bearish divergences, where price action is not confirmed by the indicator, are highlighted as strong potential reversal signals for RSI, MACD, and Stochastics. The consistent interpretation of divergence across these different tools underscores its fundamental importance in assessing the underlying health and sustainability of a trend.
Strength in Numbers: Why Combining Technical Indicators is Key for Robust Signals
While individual technical indicators can provide valuable insights, their true power often emerges when they are used in combination. Relying on a single indicator can be precarious, as no tool is infallible or suited for all market conditions. By strategically combining indicators, traders aim to achieve signal confluence, filter out market “noise,” and build a more robust and reliable trading framework.
The Confluence Advantage: Getting More Than the Sum of Parts
The primary rationale for combining technical indicators is to cross-validate signals. If multiple, preferably complementary, indicators generate similar buy or sell signals simultaneously, the probability of that signal being accurate increases. This approach helps to filter out false signals or “noise” that a single indicator might produce, especially in volatile or uncertain market conditions.
Furthermore, different indicators are designed to measure different aspects of market behavior, such as trend, momentum, volume, and volatility. By using a selection of tools from different categories, traders can gain a broader and more nuanced market perspective, allowing them to adapt their strategies to prevailing conditions and pinpoint more precise entry and exit points. The core principle is to seek signal confluence from non-correlated or differently derived information sources. If a trend-following indicator and a momentum indicator both signal a buy, it carries more weight than if two similar trend indicators provide the same signal.
Proven Pairings: Popular & Effective Indicator Combinations

Certain combinations of indicators have become popular due to their complementary nature and effectiveness in providing more reliable trading signals. An effective combination is not merely about overlaying indicators on a chart; it involves understanding their interaction in different market phases and using their combined output to make informed decisions.
- RSI + MACD: A Momentum Power Duo
- Rationale: Both are momentum indicators, but they are calculated differently and can confirm each other. RSI is excellent for identifying overbought/oversold conditions and divergences, while MACD is effective for spotting changes in trend direction and momentum through its crossovers.
- What to Look For: A strong buy signal might occur if the RSI moves out of oversold territory (e.g., crosses above 30) around the same time the MACD line has a bullish crossover above its signal line. Bearish or bullish divergences appearing on both indicators simultaneously would provide even stronger confirmation of a potential reversal.
- Example Scenario: A stock price is declining, and the RSI shows bullish divergence (price makes a lower low, RSI makes a higher low). Shortly after, the MACD histogram turns positive, and the MACD line crosses above the signal line. This confluence suggests a high probability of an upward reversal.
- Moving Averages + Bollinger Bands: Trend & Volatility Synergy
- Rationale: Moving averages help define the overall trend direction, while Bollinger Bands measure volatility and identify relative overbought/oversold levels within that trend.
- What to Look For: In an uptrend (price above a key MA like the 50-day SMA), a pullback to the lower Bollinger Band that holds (price doesn’t close below it) can be a buying opportunity, especially if the price then bounces back towards the middle or upper band. A “double bottom” where the first low touches or breaks the lower band and the second low forms inside the lower band can also be a bullish signal.
- Example Scenario: A currency pair is in a confirmed uptrend, with its price consistently above the 20-period SMA (the middle Bollinger Band). The price then corrects and touches the lower Bollinger Band, which also coincides with a previous minor support level. If a bullish candlestick pattern forms at this juncture, it provides a combined signal to enter a long trade.
- Ichimoku Cloud + Other Confirmations (e.g., RSI, Volume): Enhancing the Cloud’s Clarity
- Rationale: The Ichimoku Cloud provides a comprehensive view of trend, support, and resistance. Combining it with RSI can help avoid entering trades when the market is already overextended, and volume can confirm the strength of breakouts from the Kumo (Cloud).
- What to Look For: A strong bullish signal could be: price breaks above the Kumo, the Tenkan-sen crosses above the Kijun-sen (both above the Kumo), the Chikou Span is above the price action of 26 periods ago, the RSI is not in overbought territory (e.g., below 70), and there’s a noticeable increase in trading volume accompanying the Kumo breakout.
- Example Scenario: Bitcoin’s price has been trading below a thick Kumo. It then breaks decisively above the Kumo on high volume. The Tenkan-sen has crossed above the Kijun-sen, and the Chikou Span is also above the past price. The RSI is at 60, indicating bullish momentum but not yet overbought. This combination offers a robust buy signal.
- ADX + Moving Averages + RSI/MACD
- Rationale: The Average Directional Index (ADX) measures trend strength (not direction). MAs determine trend direction, and RSI/MACD provide momentum signals and entry triggers.
- What to Look For: For an uptrend entry: ADX is above 25 (indicating a strong trend). Price is above the 50-day EMA (confirming uptrend direction). The RSI dips below 30 (oversold) and then rises back above it (buy trigger). Alternatively, for a downtrend entry: ADX is above 25. Price is below the 50-day EMA. The MACD line crosses below the signal line, and both are below the zero line (sell trigger).
- Example Scenario: A stock shows an ADX reading of 30, indicating a strong trend. The price is consistently trading above its rising 50-EMA. The RSI pulls back to 35 and then turns up, crossing above 40. This confluence suggests a good point to enter a long trade in the direction of the established strong trend.
Smart Combinations: Choosing Complementary, Not Redundant, Tools
When combining indicators, the goal is to select tools that provide different types of information or analyze the market from different perspectives. Using two trend-following indicators that are calculated similarly (e.g., two different lengths of SMAs) might lead to redundant signals rather than independent confirmation. A more effective approach is to pair, for example, a trend indicator with a momentum indicator, or a volatility indicator with a volume indicator.
However, traders should also be wary of “analysis paralysis”, a state of indecision caused by using too many indicators and receiving conflicting signals. Often, a combination of two to three well-chosen, complementary indicators is sufficient to build a robust trading strategy. The key is to understand each indicator’s purpose, strengths, and weaknesses, and how they interact under various market conditions.
Table 3: Power Combos: Effective Technical Indicator Pairings & Why They Work
| Combination | Rationale for Combining | What to Look For (Key Signals) | Example Scenario |
| RSI + MACD | Momentum confirmation from two differently calculated oscillators; Overbought/ Oversold context | RSI divergence + MACD crossover in the direction of divergence; RSI exiting overbought/ oversold + confirming MACD crossover. | Price makes a higher high, RSI makes a lower high (bearish divergence). MACD then has a bearish crossover (MACD line below signal line) as price starts to fall. |
| Moving Averages + Bollinger Bands | Trend direction from MA; Volatility and relative price extremes from Bollinger Bands. | Price pulls back to MA (acting as support in uptrend), which coincides with lower Bollinger Band; Breakout from Bollinger Band Squeeze in direction of MA trend. | In an uptrend (price > 50-day MA), price touches the lower Bollinger Band and forms a bullish reversal candle, signaling a buy. |
| Ichimoku Cloud + RSI/Volume | Comprehensive trend/S&R from Ichimoku; Momentum check from RSI; Breakout strength from Volume. | Kumo breakout confirmed by high volume; Tenkan/Kijun cross with RSI not in extreme territory. | Price breaks above the Kumo on significantly increased volume. Chikou Span is above past price. RSI is bullish but not >70. |
| ADX + Moving Averages + Momentum Indicator | Trend strength (ADX), trend direction (MA), entry trigger (RSI or MACD). | ADX > 25 (strong trend), price aligned with MA direction, momentum indicator gives signal in trend direction (e.g., RSI pullback buy in uptrend). | ADX is 30 (strong trend). Price is above 50-EMA (uptrend). RSI dips to 40 (near support in uptrend) and turns up. MACD shows bullish crossover. Buy signal. |
| Fibonacci Retracement + Candlestick Patterns | Fibonacci levels provide potential S/R; Candlestick patterns confirm reversal at these levels. | Price retraces to a key Fibonacci level (e.g., 61.8%) and forms a clear reversal candlestick pattern (e.g., hammer, bullish engulfing). | Stock in an uptrend pulls back to the 61.8% Fibonacci retracement level and forms a hammer candlestick, signaling a potential end to the pullback and resumption of the uptrend. |
Wisdom from the Masters: How Trading Legends Use Technical Indicators
Observing how seasoned, successful traders apply technical analysis can provide invaluable lessons, often highlighting principles of simplicity, discipline, and adaptation over the pursuit of a flawless system. Their approaches demonstrate a spectrum from focused simplicity to more complex, multifaceted systems, yet all underscore the importance of a well-mastered and consistently applied methodology.
Peter Brandt: The Simplicity of Moving Averages for Trend Identification
Renowned classical chartist Peter Brandt is known for his straightforward approach. He primarily uses a basic 8/18 bar Moving Average (MA) combination as a proxy for identifying market trends and determining the path of least resistance. For instance, if Bitcoin is trading below both its 8-bar and 18-bar MAs, Brandt would interpret this as a bearish market trend.
Crucially, Brandt emphasizes that his method isn’t about finding the “perfect” indicator or achieving flawless prediction. Instead, he stresses the importance of mastering the chosen tools and “learning the personality” of the specific moving averages one decides to use, rather than constantly switching indicators or over-optimizing parameters. His philosophy suggests that consistency and deep familiarity with a simple tool can be more effective than a superficial understanding of many complex ones.
Linda Raschke: A Multi-faceted Approach with Oscillators and Patterns
Linda Raschke, another respected trader, employs a more diverse toolkit but with highly specific, well-defined setups. Her preferred indicators include:
- A 20-period Exponential Moving Average (EMA).
- Her custom 3/10 oscillator (the difference between a 3-period and 10-period simple moving average, with a 16-period simple moving average of that result acting as a signal line).
- Keltner Channels (based on a 2.5 Average True Range centered around the 20-period EMA).
- Stochastics (commonly a 7-period %K, 16-period %D combination) for oscillator pattern recognition.
Raschke is also known for trading classical chart patterns like Flags (continuation patterns in trending markets) and a specific setup she calls the “Anti” (a small flag-like pattern occurring in a trading range or after a reversal from a sustained trend). Her strategies incorporate setups like the “Grail” (triggered when the 14-period ADX is above 30 and price retraces to the 20-EMA), the “Oops” trade (a gap reversal strategy), and identifying NR7 days (the narrowest range in seven days) as precursors to breakouts. She further complements her analysis with market sentiment indicators like the NYSE TICK and short-term momentum measures like the 2-period Rate-of-Change (ROC).
Mark Minervini: Pinpointing Entries with SEPA & The Trend Template
Mark Minervini is acclaimed for his SEPA (Specific Entry Point Analysis) methodology, which meticulously combines robust technical analysis with strong fundamental criteria to identify high-growth stocks poised for significant moves. His approach is about pinpointing precise entry points where risk is minimized.
His Trend Template is a systematic screening tool with specific criteria to identify stocks in confirmed Stage 2 uptrends:
- The current stock price is above both the 150-day (30-week) and the 200-day (40-week) moving average price lines.
- The 150-day moving average is above the 200-day moving average.
- The 200-day moving average line is trending up for at least 1 month (preferably 4–5 months minimum).
- The 50-day (10-week) moving average is above both the 150-day and 200-day moving averages.
- The current stock price is trading above the 50-day moving average.
- The current stock price is at least 25% (or 30% as per another source) above its 52-week low.
- The current stock price is within at least 25% of its 52-week high (the closer to a new high, the better).
- The Relative Strength (RS) ranking (e.g., as reported by Investor’s Business Daily) is no less than 70 (preferably in the 80s or 9s).
Minervini looks for tight price consolidations, often referred to as Volatility Contraction Patterns (VCP), and bullish chart patterns before a stock breaks out. He also emphasizes the importance of rising prices on increasing volume, which suggests institutional buying and confirms the strength of a move.
The approaches of these experts illustrate that there isn’t a single “correct” way to use technical indicators. Success appears to stem from developing a well-mastered, consistent methodology tailored to the individual trader’s style and market understanding. Furthermore, their methods are not about infallible prediction but about identifying high-probability setups and rigorously managing risk. Minervini’s SEPA, for instance, is explicitly about finding entries that minimize risk, while Raschke’s setups incorporate defined risk-reward ratios. Brandt’s use of MAs as a “proxy” for trend, rather than a definitive crystal ball, also underscores this probabilistic, risk-managed approach.
Table 4: Expert Trader Indicator Preferences & Core Philosophy
| Expert | Preferred Indicator(s)/Patterns | Core Strategy/Philosophy |
| Peter Brandt | Basic 8/18 bar Moving Averages (MAs). | Simplicity; use MAs as a proxy for trend to find the path of least resistance; master chosen tools and learn their “personality.” |
| Linda Raschke | 20-EMA, 3/10 oscillator, Keltner Channels, Stochastics, Flags, Anti pattern, Grail, Oops trade, NR7 days, TICK, 2-period ROC. | Multi-faceted approach using specific setups for various market conditions (trending, ranging, breakouts); combines oscillators, patterns, and sentiment. |
| Mark Minervini | SEPA method using Trend Template: specific MA alignments (50, 150, 200-day), price relative to 52-week high/low, high Relative Strength. Also, VCPs, chart patterns, and volume analysis. | Combines strong fundamentals (earnings/revenue growth) with precise technical entry points (SEPA) to find high-growth stocks at low-risk junctures. |
Technical vs. Fundamental Analysis: Crafting a Holistic Trading Approach
In the world of market analysis, two primary schools of thought dominate: technical analysis (TA) and fundamental analysis (FA). While some traders adhere strictly to one or the other, many find significant value in integrating aspects of both to create a more comprehensive and robust trading or investment strategy.
Understanding the Core Differences
Fundamental Analysis (FA) focuses on evaluating an asset’s intrinsic or “fair” value. This involves a deep dive into the underlying factors that affect a security’s worth, such as a company’s financial health (earnings, revenue, debt, cash flow), management quality, competitive advantages, industry conditions, and broader macroeconomic trends. The goal of FA is to identify securities that are either undervalued (and thus potential buys) or overvalued (potential sells or shorts) by the market. Fundamental analysis is generally favored by long-term investors who aim to benefit from a company’s growth and profitability over extended periods.
Technical Analysis (TA), as discussed extensively, takes a different approach. It disregards the intrinsic value of a security and instead focuses on market-generated data, primarily historical price movements and trading volume, to forecast future price trends. TA operates on the assumption that all relevant fundamental information is already reflected in the current market price, making the study of price patterns and indicator signals the most efficient way to make trading decisions, especially for shorter time horizons.
Table 5: Technical Analysis vs. Fundamental Analysis: Key Distinctions
| Aspect | Technical Analysis | Fundamental Analysis |
| Focus | Market action (price, volume, patterns) | Intrinsic value (financial health, economic factors, industry trends) |
| Time Horizon | Typically short to medium-term | Typically medium to long-term |
| Data Used | Historical price charts, trading volume, and technical indicators | Financial statements, economic reports, industry data, company news, management quality |
| Goal | Forecast future price movements, identify entry/exit points | Determine if a security is under- or overvalued |
| Core Assumptions | Market discounts everything; prices move in trends; history repeats itself. | Market price will eventually converge to intrinsic value; inefficiencies can be exploited. |
| Typical User | Traders (day traders, swing traders) | Investors (value investors, growth investors, buy-and-hold) |
The Synergy: How Combining Both Can Sharpen Your Edge
While TA and FA are distinct, they are not mutually exclusive. Many experienced market participants advocate for combining elements of both to achieve a more holistic view and potentially superior results. The common heuristic is that fundamental analysis helps determine what to buy or sell, while technical analysis helps determine when to execute the trade.
A practical approach to integrating these methodologies could involve the following steps:
- Start with Fundamental Analysis: Screen for companies with strong underlying fundamentals. This includes analyzing revenue and earnings growth, profit margins, debt levels (debt/equity ratio), return on equity (ROE), management competence, competitive advantages (economic moats), and overall valuation (P/E ratio, PEG ratio). This process helps identify fundamentally sound businesses that are worth considering for investment.
- Use Technical Analysis to Identify Entry Points: Once a list of fundamentally strong stocks is compiled, use technical analysis to pinpoint opportune moments to buy. This involves studying price charts for bullish patterns (e.g., double bottoms, ascending triangles, bull flags), breakouts above key resistance levels, bullish moving average crossovers (like the “golden cross”), or oversold conditions on momentum indicators like RSI or MACD.
- Let Winners Ride Using Technical Analysis: After entering a trade based on favorable fundamental and technical signals, continue to use technical tools to manage the position. Monitor trend channels, support levels, and moving averages to allow profitable trades to continue running as long as the uptrend remains intact. Avoid selling prematurely based on minor fluctuations if the primary technical trend is still positive.
- Cut Losses Short Using Technical Tools: Conversely, if a trade moves against the initial position, technical analysis provides logical points to exit and limit losses. Stop-loss orders can be placed below key support levels, important moving averages, or chart pattern invalidation points. This disciplined approach helps remove emotion from the selling decision.
- Verify Breakouts and Breakdowns: Technical chart patterns can sometimes generate false signals. To increase reliability, verify breakouts above resistance or breakdowns below support by checking for an expansion in trading volume on the bar where the break occurs. Additionally, ensure that any significant fundamental news or information aligns with the technical signal. For example, a bullish breakout is more convincing if accompanied by a positive earnings report.
- Focus on Longer Timeframes for Trend Identification: When conducting technical analysis for trend direction, prioritize daily, weekly, and monthly charts, as these longer timeframes carry more weight in defining the major trend. Shorter-term charts (e.g., hourly, 5-minute) can then be used for more precise entry and exit timing within the context of the established longer-term trend.
- Let Fundamentals Override Contrary Technicals (Long-Term View): Technical indicators are not perfect and can sometimes generate signals that contradict a strong fundamental outlook. In such cases, especially for longer-term investors, if the underlying fundamentals of a company remain robust or are improving, it may be prudent to give more weight to the fundamentals and view short-term adverse technical signals as temporary noise.
A deeper consideration is that technical analysis can also serve to validate or invalidate fundamental theses in real time. The “market discounts everything” principle of TA means that price and volume action reflect the collective market’s interpretation of all available information, including fundamentals. If a company reports stellar earnings (positive fundamental news), but its stock price fails to rally or even declines on heavy volume (negative technical action), it could signal that the market, for reasons perhaps not yet widely understood or perhaps due to broader sentiment, is not embracing the positive fundamental view. In this way, TA acts as a crucial market sentiment check on fundamental analysis, offering a real-time gauge of how the broader market is pricing in a company’s prospects.
Avoiding the Traps: Common Mistakes in Technical Analysis (And How to Sidestep Them)

While technical analysis offers a powerful toolkit for navigating the markets, its effectiveness can be significantly undermined by common mistakes in application and interpretation. Many perceived “indicator failures” are, in reality, “trader failures” stemming from psychological biases, misapplication of tools in unsuitable market contexts, or a lack of disciplined risk management. Understanding these pitfalls is the first step towards avoiding them.
- The Pitfalls of Relying on a Single Indicator:
No single technical indicator is a silver bullet; each has strengths and weaknesses and performs differently under various market conditions. Basing entire trading decisions on one indicator can lead to poor judgment, missed opportunities due to its limitations, or being caught on the wrong side of a move when that indicator provides a false signal.- How to Avoid: Employ a combination of complementary indicators from different categories (e.g., trend, momentum, volume). This allows for cross-validation of signals and provides a more holistic market view.
- The “Holy Grail” Hunt: Over-Optimization and Its Dangers (Overfitting):
Many traders endlessly search for the “perfect” indicator or system, often leading to over-optimization. This involves tweaking indicator parameters or strategy rules excessively to achieve stellar results on historical data (backtesting). Such systems are “curve-fitted” to past noise and often fail dramatically in live trading because the specific historical patterns they were optimized for do not repeat precisely. The belief that a specific indicator is a “holy grail” is a myth; losses often stem more from poor risk management or emotional trading than from the indicator itself.- How to Avoid: Aim for robust trading systems that perform reasonably well across various historical periods without excessive tweaking. Use out-of-sample data (data not used in the optimization process) to validate backtest results. Focus on understanding and mastering a few well-chosen indicators rather than constantly chasing new, complex ones.
- Market Context is King: Why Ignoring It Spells Trouble:
Technical indicators are not universally applicable; their effectiveness is highly dependent on the prevailing market conditions. For example, trend-following indicators like moving averages tend to generate false signals (whipsaws) in sideways or ranging markets, while momentum oscillators like RSI or Stochastics can give premature or misleading overbought/oversold signals in strongly trending markets. Ignoring the broader market environment, significant news events, or sector trends when interpreting indicator signals is a common error.- How to Avoid: Continuously monitor overall market conditions (trending, ranging, volatile). Adapt your choice of indicators and strategies accordingly. For instance, use trend-following tools in trending markets and oscillators in range-bound conditions. Consider incorporating fundamental news and macroeconomic factors for a broader context.
- The Mental Game: How Trading Psychology & Biases Impact Your Indicator Use:
Psychological biases can severely distort the interpretation and application of technical indicators, often leading to suboptimal decisions even with sound tools.- Subjectivity & Interpretation: The reading of chart patterns and even some indicator signals can be subjective. Different analysts might draw different conclusions from the same data, leading to inconsistent actions.
- Confirmation Bias: This is the tendency to seek out and give more weight to information or indicator signals that confirm one’s pre-existing beliefs or current positions while downplaying or ignoring contradictory signals. For example, a trader who is bullish on a stock might only focus on buy signals from their indicators and dismiss sell signals.
- Overconfidence Bias: Traders may overestimate their ability to interpret indicators correctly or predict market movements, leading them to take excessive risks or ignore warning signs.
- Loss Aversion: The pain of a loss is often felt more strongly than the pleasure of an equivalent gain. This can cause traders to hold onto losing positions based on indicator signals, hoping for a turnaround, rather than cutting losses according to their plan.
- Herd Mentality: This involves following the signals or actions of a large group of traders (the “herd”) without conducting independent analysis, often driven by fear of missing out (FOMO).
- Anchoring Bias: Traders may become fixated on a specific past price level, indicator reading, or initial trade idea, making it difficult to adjust to new information or changing market conditions.
- How to Avoid Psychological Pitfalls: Develop self-awareness to identify personal biases. Create and strictly adhere to a detailed trading plan that outlines entry, exit, and risk management rules. Keep a trading journal to review decisions objectively and learn from mistakes. Practice discipline and emotional control.
- The Non-Negotiable: Risk Management in Indicator-Based Trading:
One of the most critical yet often neglected aspects is robust risk management. No matter how reliable an indicator or strategy seems, unexpected market moves can occur. Failing to implement proper risk controls, such as setting stop-loss orders and determining appropriate position sizes, is a primary cause of significant losses. Over-leveraging, often driven by overconfidence in a particular indicator signal or pattern, can amplify losses catastrophically.- How to Avoid: Always define your maximum acceptable risk per trade (e.g., 1-2% of trading capital) before entering. Set stop-loss orders based on logical technical levels (e.g., below support, beyond a pattern invalidation point). Calculate position size based on your risk per trade and stop-loss distance. Maintain a favorable risk/reward ratio for trades.
- Other Common Mistakes to Sidestep:
- Ignoring Confirmation Signals / Acting Too Early: Entering trades based on an initial indicator signal without waiting for confirmation from price action or other complementary indicators.
- Misidentifying Pattern Failures: Prematurely assuming a chart pattern has failed or misinterpreting the conditions that define a true failure.
- Overtrading: Entering too many trades based on frequent or weak indicator signals, often leading to increased transaction costs and emotional fatigue.
- Using Too Many Indicators: Cluttering charts with an excessive number of indicators can lead to “analysis paralysis” and conflicting signals, making decision-making more difficult rather than clearer.
The pursuit of complex indicator systems can often distract from the more fundamental pillars of successful trading: mastering basic risk management principles and cultivating psychological discipline. These elements are arguably more critical for long-term viability in the markets than the search for an elusive, perfectly predictive indicator.
Table 6: Mind Over Market: Common Trading Biases & Counter-Strategies
| Bias Name | Description | Impact on Trading with Indicators | How to Mitigate |
| Confirmation Bias | Tendency to seek, interpret, and recall information that confirms pre-existing beliefs. | Selectively focusing on indicator signals that support a desired trade, ignoring contradictory signals. | Actively seek disconfirming evidence; use a trading journal to objectively review all signals; follow a predefined trading plan. |
| Overconfidence Bias | Overestimating one’s abilities, knowledge, or the accuracy of one’s forecasts. | Believing one can perfectly interpret indicator signals or predict market moves, leading to excessive risk-taking or ignoring stops. | Review past trades objectively; seek external feedback; acknowledge the probabilistic nature of trading; adhere to risk management rules. |
| Loss Aversion | The psychological pain of a loss is about twice as powerful as the pleasure of an equivalent gain. | Holding onto losing trades signaled by indicators, hoping for a reversal, rather than accepting a small loss. | Define and respect stop-loss levels; focus on the trading process and probabilities rather than individual trade outcomes. |
| Herd Mentality | Tendency for individuals to mimic the actions (rational or irrational) of a larger group. | Following popular indicator signals or “guru” recommendations without independent analysis; buying into bubbles or panic selling. | Develop an independent trading plan based on personal research and risk tolerance; avoid FOMO (Fear Of Missing Out). |
| Anchoring Bias | Over-reliance on the first piece of information offered (the “anchor”) when making decisions. | Fixating on a past indicator reading (e.g., a previous RSI oversold level) or an initial entry price, influencing future decisions. | Regularly re-evaluate market conditions and indicator signals based on current data; be flexible and adapt to new information. |
| Negativity Bias | Psychological phenomenon by which humans have a greater recall of unpleasant memories compared with positive ones. | Focusing excessively on potential negative outcomes of a trade or past losses from an indicator, leading to missed opportunities. | Balance negative thoughts with objective analysis of probabilities; focus on the statistical edge of a strategy over many trades. |
| Hindsight Bias | Tendency to see past events as having been more predictable than they actually were. | Believing that past indicator signals were “obvious” after the fact, leading to overconfidence in predicting future signals. | Keep a detailed trading journal of why trades were taken before the outcome is known; acknowledge the role of uncertainty. |
| Recency Effect | Putting more weight or importance on recent events when making decisions. | Overemphasizing the performance of an indicator in the most recent trades or market conditions, ignoring its longer-term behavior. | Consider a broader historical context for indicator performance; avoid making drastic strategy changes based on short-term results. |
Beyond the Basics: Exploring Unique & Advanced Technical Insights
While mastering the common technical indicators forms a solid foundation, the world of technical analysis extends into more sophisticated and sometimes less conventional territories. Exploring these advanced concepts can offer unique perspectives on market dynamics, potentially uncovering edges that are not apparent through standard tools alone. However, these often come with increased complexity and subjectivity, requiring a deeper level of understanding and validation.
- Gann Angles: Finding Harmony Between Price and Time
Developed by the legendary W.D. Gann, Gann angles are a unique technical analysis tool that aims to integrate price and time movements to forecast future support and resistance levels and identify potential trend changes. Unlike traditional trendlines, which are drawn connecting price highs or lows, Gann angles are diagonal lines drawn from significant price peaks or troughs at specific geometric angles. The most fundamental of these is the 1×1 angle (a 45-degree line), which represents a perfect balance where price moves one unit for each unit of time. Other angles, such as 1×2 (price moves one unit for every two units of time) or 2×1 (price moves two units for every one unit of time), represent faster or slower rates of ascent or descent.
Traders use Gann angles to identify potential turning points and gauge trend strength. If price respects a particular Gann angle (e.g., consistently finds support on an ascending 1×1 angle), it suggests the trend is stable. A break of a key Gann angle can signal a significant shift in momentum.
The primary advantage of Gann angles lies in their predictive nature, attempting to forecast future S/R levels by projecting these geometric relationships forward. However, their main disadvantage is subjectivity in placement and the complexity of correctly scaling charts to ensure the angles are geometrically accurate. Their effectiveness can be highly dependent on the trader’s skill and experience. - Sentiment Indicators: Adding Market Emotion to Your Technical Toolkit
While classical technical analysis primarily focuses on price and volume, sentiment indicators attempt to quantify the overall mood or attitude of market participants (e.g., bullish, bearish, fearful, greedy). The theory is that collective emotion can drive prices, sometimes irrationally, and that extremes in sentiment often precede market reversals.
Examples of sentiment indicators include:- Put/Call Ratio: Measures the trading volume of put options versus call options. A high ratio can indicate bearish sentiment, while a low ratio suggests bullishness.
- Volatility Index (VIX): Often called the “fear index,” the VIX measures expected market volatility. High VIX levels typically correlate with fear and market bottoms, while low VIX levels can indicate complacency and potential market tops.
- Advance/Decline Line (ADL): Tracks the net number of advancing stocks versus declining stocks, indicating market breadth and underlying strength or weakness.
- High-Low Index: Compares stocks making new 52-week highs to those making new 52-week lows.
- Bullish Percent Index (BPI): Shows the percentage of stocks within an index that are exhibiting bullish patterns on their point-and-figure charts.
Combining sentiment indicators with technical analysis can provide valuable context. For instance, if technical indicators suggest a buy signal, but the sentiment is extremely bullish (potentially indicating an overbought market or “dumb money” piling in), a cautious trader might wait for a pullback or further confirmation. Divergences between price action and sentiment can also be powerful; for example, if prices are rising but broad market sentiment is deteriorating, it could be a warning sign. However, sentiment can change rapidly and is subject to herd behavior, making these indicators sometimes misleading if used in isolation.
- Volume Analysis Deep Dive: Unconventional Ways to Read Market Strength
Beyond simply observing volume bars at the bottom of a chart, advanced volume analysis techniques seek to extract deeper insights into buying and selling pressure. These methods move beyond just how much was traded to where (at what price levels) and how aggressively the volume occurred.- Volume Profile (Market Profile): This displays trading volume horizontally at different price levels over a specified period, rather than vertically over time. It highlights price zones where significant trading activity (high volume nodes, HVNs) or minimal activity (low volume nodes, LVNs) occurred. HVNs often act as strong support or resistance, representing areas of price agreement, while LVNs can be areas price moves through quickly.
- Delta Volume: Delta measures the difference between buying volume (trades executed at the ask price) and selling volume (trades executed at the bid price) within a specific period or price bar. Positive delta indicates more aggressive buying, while negative delta shows more aggressive selling. Divergences between price and delta can signal weakening momentum.
- Footprint Charts (Order Flow Charts): These provide a granular view of trading activity by showing the actual volume traded at each specific price level within each candlestick. This allows traders to see precisely where buying and selling pressure occurred, identify absorption of orders, and spot large institutional activity.
These advanced volume tools aim to reveal the “actual activity of market participants” and the “balance of power between buyers and sellers”, offering a more profound understanding of the forces driving price patterns than what is visible from price action alone.
- Advanced Chart Patterns & Strategies (Brief Introduction):
- Elliott Wave Theory: Developed by R.N. Elliott, this theory posits that market prices move in predictable, recurring wave patterns driven by mass investor psychology. The basic pattern consists of five “impulse waves” in the direction of the main trend, followed by three “corrective waves” against the trend. Each wave has its own characteristics and often adheres to Fibonacci relationships in terms of length and retracement. Elliott Wave analysis is complex and subjective, as identifying and labeling waves correctly can be challenging. It is often combined with Fibonacci retracement and extension levels to project wave targets.
- Harmonic Patterns: These are geometric price patterns (e.g., Gartley, Bat, Butterfly, Crab) that are defined by specific Fibonacci ratios between their constituent price swings. They are used to identify potential trend reversal zones with a high degree of precision. Like Elliott Wave, identifying and validating harmonic patterns requires careful measurement and adherence to specific ratio alignments.
These advanced techniques often introduce a higher degree of subjectivity and complexity compared to standard indicators. While they can be powerful in the hands of experienced analysts who have thoroughly studied and validated them, they can be misleading for novices if not applied with a deep understanding of their nuances and limitations. The shift towards sentiment and advanced volume analysis represents a move from simply recognizing price/indicator patterns (the “what”) to attempting to understand the underlying market forces, such as mass psychology or institutional order flow, that cause those patterns (the “why”).
Charting Your Path to Success: Mastering Technical Analysis for Consistent Profits
The journey into technical analysis is one of continuous learning, practice, and adaptation. There are no shortcuts to consistent profitability, and mastery is not about discovering a single “perfect” indicator or foolproof system. Instead, it’s about developing a robust, adaptable process that integrates sound analysis, disciplined risk management, and crucial self-awareness regarding one’s own psychological biases.
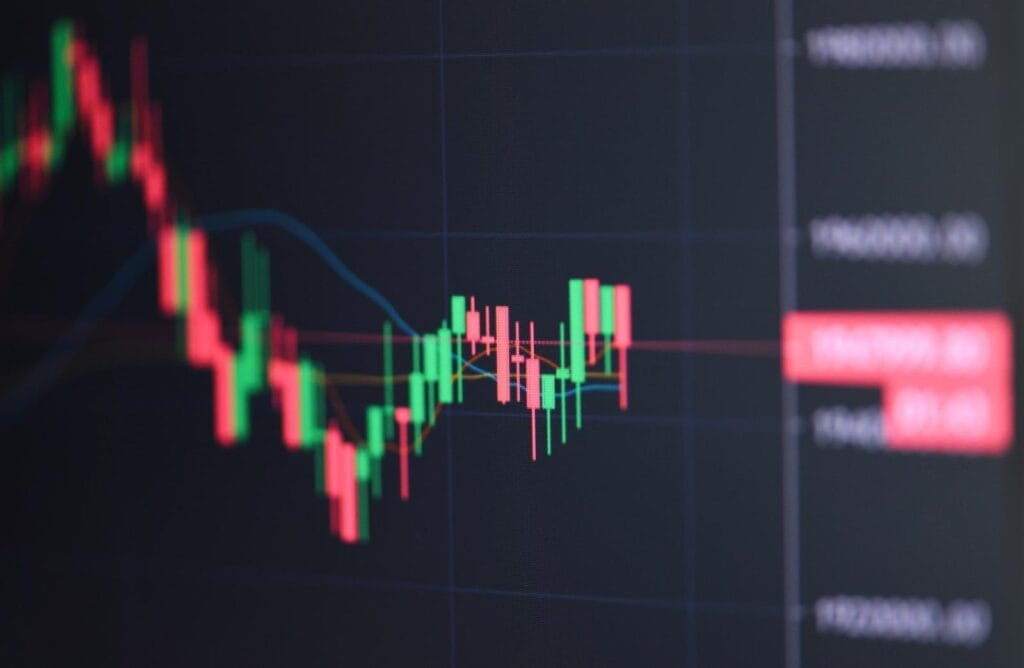
Key Takeaways for Aspiring and Improving Traders:
- Understand Core Principles: A solid grasp of the foundational assumptions of technical analysis, that the market discounts everything, prices move in trends, and history tends to repeat itself, is essential before diving into specific tools.
- No Indicator is a Standalone Solution: As demonstrated throughout this guide, individual indicators have strengths and weaknesses. Their reliability is significantly enhanced when used in combination, allowing for signal confluence and the filtering of noise. Confirmation from multiple, preferably complementary, sources is vital.
- Risk Management is Paramount: Even the most sophisticated technical analysis can fail if not paired with rigorous risk management. Defining your risk per trade, using stop-loss orders appropriately, and managing position size are non-negotiable components of any trading plan.
- Trading Psychology Matters Immensely: Emotional and cognitive biases can sabotage even the best technical setups. Cultivating discipline, objectivity, and an awareness of one’s own psychological tendencies is as important as understanding the indicators themselves.
- Start Simple, Then Expand: For those new to technical analysis, it’s advisable to begin by mastering one or two basic, widely used indicators (like Moving Averages and RSI). Understand their calculations, signals, and limitations in various market conditions before gradually incorporating more tools or advanced concepts.
The Journey of Mastery: Continuous Learning, Practice, and Adaptation
Technical analysis is not a static set of rules but a dynamic skill that is honed over time through dedicated practice and experience. Financial markets are constantly evolving, influenced by new technologies, changing participant behaviors, and shifting macroeconomic landscapes. Therefore, strategies and indicator interpretations that worked in the past may need to be adapted or refined to remain effective.
- Backtesting and Paper Trading: Before risking real capital, thoroughly backtest any strategy based on technical indicators using historical data. This helps to assess its potential viability and identify its characteristics (e.g., win rate, drawdown). Paper trading (simulated trading) allows for practicing execution and strategy application in a risk-free environment.
- Develop a Personalized Trading Plan: A comprehensive trading plan is crucial. It should outline your goals, risk tolerance, preferred markets and timeframes, specific entry and exit criteria based on your chosen indicators and strategies, and rules for money management. This plan serves as a roadmap and helps maintain discipline.
- Continuous Education: The financial markets and the tools used to analyze them are always evolving. Commit to ongoing learning by reading reputable books, following credible market analysts, and staying updated on new research and techniques.
Ultimately, success in trading with technical analysis is less about finding a secret formula and more about building a personalized, disciplined approach that aligns with one’s understanding of the market and individual risk profile. It’s a journey that rewards patience, diligence, and a commitment to continuous improvement.
Expand Your Knowledge: Top Books & Resources for Technical Analysts
For those looking to deepen their understanding of technical analysis, a wealth of knowledge can be found in seminal books written by pioneers and experts in the field. These texts often emphasize foundational principles and the art of chart interpretation, which are as crucial as the science of indicators. The insights gleaned from these resources can provide a more profound understanding of market psychology as reflected in price action, a prerequisite for the effective use of any technical tool.
Here are some highly recommended books:
- “Technical Analysis of the Financial Markets” by John J. Murphy: Often considered the bible of technical analysis, this comprehensive guide covers everything from the basics of Dow Theory and chart construction to advanced indicators and trading strategies.
- “Technical Analysis Explained” by Martin J. Pring: Another classic, this book provides a thorough and accessible explanation of technical analysis concepts, chart patterns, and indicators, with a focus on practical application.
- “Getting Started in Technical Analysis” by Jack D. Schwager: Known for his “Market Wizards” series, Schwager offers a clear and practical introduction to technical analysis, suitable for beginners but also valuable for experienced traders looking to solidify their understanding.
- “How to Make Money in Stocks: A Winning System in Good Times and Bad” by William J. O’Neil: This book presents the CAN SLIM investing system, which notably combines fundamental analysis (strong earnings and sales growth) with technical analysis (chart patterns and timing) to identify high-growth stocks.
- “Japanese Candlestick Charting Techniques” by Steve Nison: Nison is credited with introducing Japanese candlestick charting to the Western world. This book is the definitive guide to understanding and interpreting candlestick patterns, which provide deep insights into market sentiment and potential reversals.
- “Encyclopedia of Chart Patterns” by Thomas N. Bulkowski: This exhaustive reference work provides a detailed statistical analysis of the historical performance and reliability of numerous chart patterns, offering an evidence-based perspective on their predictive power.
- “Technical Analysis Using Multiple Timeframes” by Brian Shannon: This book focuses on the importance of analyzing price action across different timeframes (e.g., daily, weekly, monthly) to gain a more complete understanding of trends and to improve trade timing.
These resources provide a strong foundation for anyone serious about utilizing technical analysis in their trading endeavors.
Your Technical Analysis Questions Answered: FAQ
This section addresses some of the most common questions traders have about technical analysis and the reliability of its indicators. Many beginner questions stem from a desire for certainty or a “silver bullet” in trading; the answers aim to guide readers toward a more nuanced understanding that emphasizes process, context, and continuous learning.
- What is technical analysis in simple terms?
Technical analysis is a method of evaluating securities by analyzing statistics generated by market activity, such as past prices and volume. The core idea is that historical market data can help predict future price movements. - What are the 3 assumptions of technical analysis?
The three main assumptions are: 1) The market discounts everything (all information is already in the price). 2) Prices move in trends. 3) History tends to repeat itself (due to consistent market psychology). - Which technical indicator is most reliable?
There’s no single “most reliable” indicator. Reliability depends heavily on the market context (trending vs. ranging), the asset being traded, the indicator’s parameters, and how it’s combined with other tools. For example, backtests on the DJIA showed RSI(14) and Bollinger Bands having high win rates, but studies on RSI in currency markets suggest standard parameters may lose efficacy over time, while altered ones can be profitable. Expert traders often emphasize mastering a few chosen tools rather than searching for one perfect indicator. - Can I use just one technical indicator?
While possible, it’s generally discouraged. No single indicator works perfectly in all market conditions. Combining complementary indicators helps confirm signals, filter out noise, and provide a more robust basis for trading decisions. - How do I choose which technical indicators to use?
Consider your trading style (e.g., trend following, swing trading, day trading), the market conditions you typically trade in, and the type of information you need (trend direction, momentum, volatility). Choose indicators from different categories that complement each other rather than providing redundant information. Start with a few well-understood indicators. - What’s the difference between leading and lagging indicators?
Leading indicators aim to predict future price movements and provide signals before a trend or reversal begins (e.g., RSI, Stochastic Oscillator). They can offer early entry, but may give more false signals. Lagging indicators follow price action and confirm trends or reversals after they have started (e.g., Moving Averages). They tend to be more reliable but result in later entries. - How important is volume in technical analysis?
Volume is very important. It’s often used to confirm the strength or conviction behind a price move or an indicator signal. For example, a breakout from a chart pattern or a move above a key resistance level is considered more significant if accompanied by high trading volume. - Is technical analysis better than fundamental analysis?
Neither is inherently “better”; they are different tools for different purposes. Fundamental analysis focuses on a security’s intrinsic value, while technical analysis focuses on price and volume patterns. Many traders and investors find that combining both approaches provides the most comprehensive view and can lead to better decision-making. - What are some common mistakes beginners make with technical indicators?
Common mistakes include over-relying on a single indicator, using too many indicators (analysis paralysis), ignoring market context (e.g., using a trend indicator in a ranging market), failing to confirm signals, over-optimizing parameters on historical data (overfitting), and neglecting proper risk management. Psychological biases also play a significant role. - How long does it take to learn technical analysis?
Learning the basics of common indicators can be relatively quick. However, mastering technical analysis, understanding its nuances, applying it effectively in different market conditions, integrating it with risk management and trading psychology, and achieving consistent results is an ongoing process that takes considerable time, practice, and continuous learning. - What are long-tail keywords for technical analysis?
Long-tail keywords are longer, more specific search phrases. For technical analysis, examples could include: “best moving average crossover strategy for forex day trading,” “how to use RSI divergence to spot stock reversals,” “combining Ichimoku Cloud with Bollinger Bands for crypto,” or “most reliable technical indicators for volatile markets”. These specific queries often indicate a user with a clearer intent.
Disclaimer: This article is for informational and educational purposes only and should not be considered financial advice. Investing in financial markets involves risk, including the possible loss of principal. Always conduct your own research and consider consulting with a qualified financial advisor before making any investment decisions.
This website may utilize artificial intelligence to assist in the creation of content. This may include generating ideas, drafting sections, and aiding in the editing process. All content is reviewed and edited by us to ensure accuracy and quality.